FableVision Learning Spotlight Blog
Categories
- Animation-ish 42
- Books 21
- Civics! 2
- Classroom Spotlight 17
- Conferences and Events 20
- Creative Educator 3
- Creativity 25
- Distance Learning 13
- Dot Day 22
- FabClassroom 28
- FabFriday 19
- FabMaker Studio 66
- FabMaker Studio Classroom 13
- FableFive 7
- FableVision Games 3
- Free Educator Resources 36
- HUTCH 1
- Home Activities 5
- In the Classroom 34
- In the News 11
- International Dot Day 23
- Ish 1
- Library 1
- Mapping the World by Heart 7
- Paul Reynolds 10
- Peter H. Reynolds 54
- Professional Development 9
- STEM/STEAM 20
- Storybook Academy 2
- Teacher Spotlight 14
- The Dot 17
- The North Star 2
- Words and Their Stories 1
- Zoombinis 3

FabMaker Project: Our Table Challenge
The following blog post is by Peggy Healy Stearns, Lead Software Designer, FabMaker Studio.

Peter H. Reynolds’ new picture book for all ages, Our Table, tells the story of a young girl named Violet who notices that, as her dad, mom and brother spend more and more time on their devices, their once lively dining table is shrinking! Violet longs to bring her family back together and dreams up a project on which they can all collaborate –- designing and building a new table!
This timely story provides an opportunity for children to consider the importance of gathering with family and friends – and to engage in a meaningful engineering design process.
To get ready and set context for the challenge, after reading Our Table, discuss students’ memories dining with family and friends. What made those times special? Where did they eat? Was there anything special about their table?

Peter’s Creative Challenge!
Peter loves using his imagination to design and make things - drawings, paintings, sculptures, and paper mache animals! And so, Peter is excited to present a special maker challenge to your students: “Using FabMaker Studio, imagine, design and fabricate your own table and/or chairs to send to me!” Peter will select some finished projects to feature on the FableVision Learning websites and social media.
So, let’s get started! Have students work collaboratively to Ask, Imagine, Plan, Create, Test and Improve a paper or cardstock prototype.

Ask: What kind of table would you like? How big should it be? What shape? Does it matter how it looks? Use questions like these to define the criteria. Students may want to research images of tables and interview family members. Then outline constraints – e.g., the final prototype must be designed with FabMaker Studio and constructed with paper or cardstock.
Now it’s time to Imagine. Have students brainstorm and sketch different designs and consider each option based on the criteria they set earlier. A single design may not meet all the criteria. Which criteria are most important? Once students choose a favorite design, they’re ready for the next step.
Tell students to use a ruler to draw a Plan for their table and label dimensions.
Then have them use FabMaker Studio to Create their prototype. They can use the Chair design found in the FabMaker Ready-Made 3D projects. This starter project shows how Shapes can be combined to create a flat pattern that folds into a 3-dimensional object. Their tables might be constructed of a single flat net like the chair or made of multiple elements folded and constructed individually and then combined.
Encourage students to be inspired by Peter’s creativity. Suggest they use FabMaker’s color and texture tool -- or use plain white cardstock and color by hand.
If there’s time, ask students to consider how they would Test their prototype? Tell them to refer back to the criteria they set at the start. If their table’s not quite right, ask them how they would Improve their design.
You can adapt this activity to different grade levels by challenging students to use FabMaker Studio to design other 2D and 3D objects from the book. Younger students can weld shapes to create fruits and vegetables. More experienced makers may want to design bowls or glasses or even the vegetable cart.
Need more tips and tricks on how to use FabMaker Studio? Check out the Tutorials page.
Send your students’ designs to info@fablevisionlearning.com or use the #FabMakerChair in your social posts . We’ll feature the best designs on the FableVision Learning Spotlight Blog!

Creative Ways to Celebrate Earth Day

A spinning globe, a 3D Turtle, and a story of your world - there are many ways you and your students can celebrate the 50th Anniversary of Earth Day with FableVision Learning’s Creativity Maker Suite of online tools.
When Earth Day was started on April 22, 1970, the impact of the movement saw 20 million participants. This day is important to help raise awareness to show how much of an impact we really do have on the environment by every little move we make.
This year, as many of us are marking the day from in our homes, we compiled a few activities to get your little ones thinking about the environment around them.
Animation-ish
Animation-ish, is an easy-to-use online animation tool - that helps students show what they know! Weave Animation-ish into your distance learning activities with a few ideas:
Animate Different Cycles:
Encourage your students to animate as a way to explore different cycles. Using the tracing feature, students can easily animate the slow transitions that lead into new phases in any of these cycles. Whether it’s showing night shift to day or animating the parts of the water cycle, check out these examples below
What are some other natural earth cycles that your class has studied? We want to hear from you about YOUR favorite Earth Day animations.
FabMaker Studio
FabMaker Studio, is our digital design and fabrication tool created to get students prototyping with paper. For more tips and tricks on how to use a printer and a pair of scissors, click here.
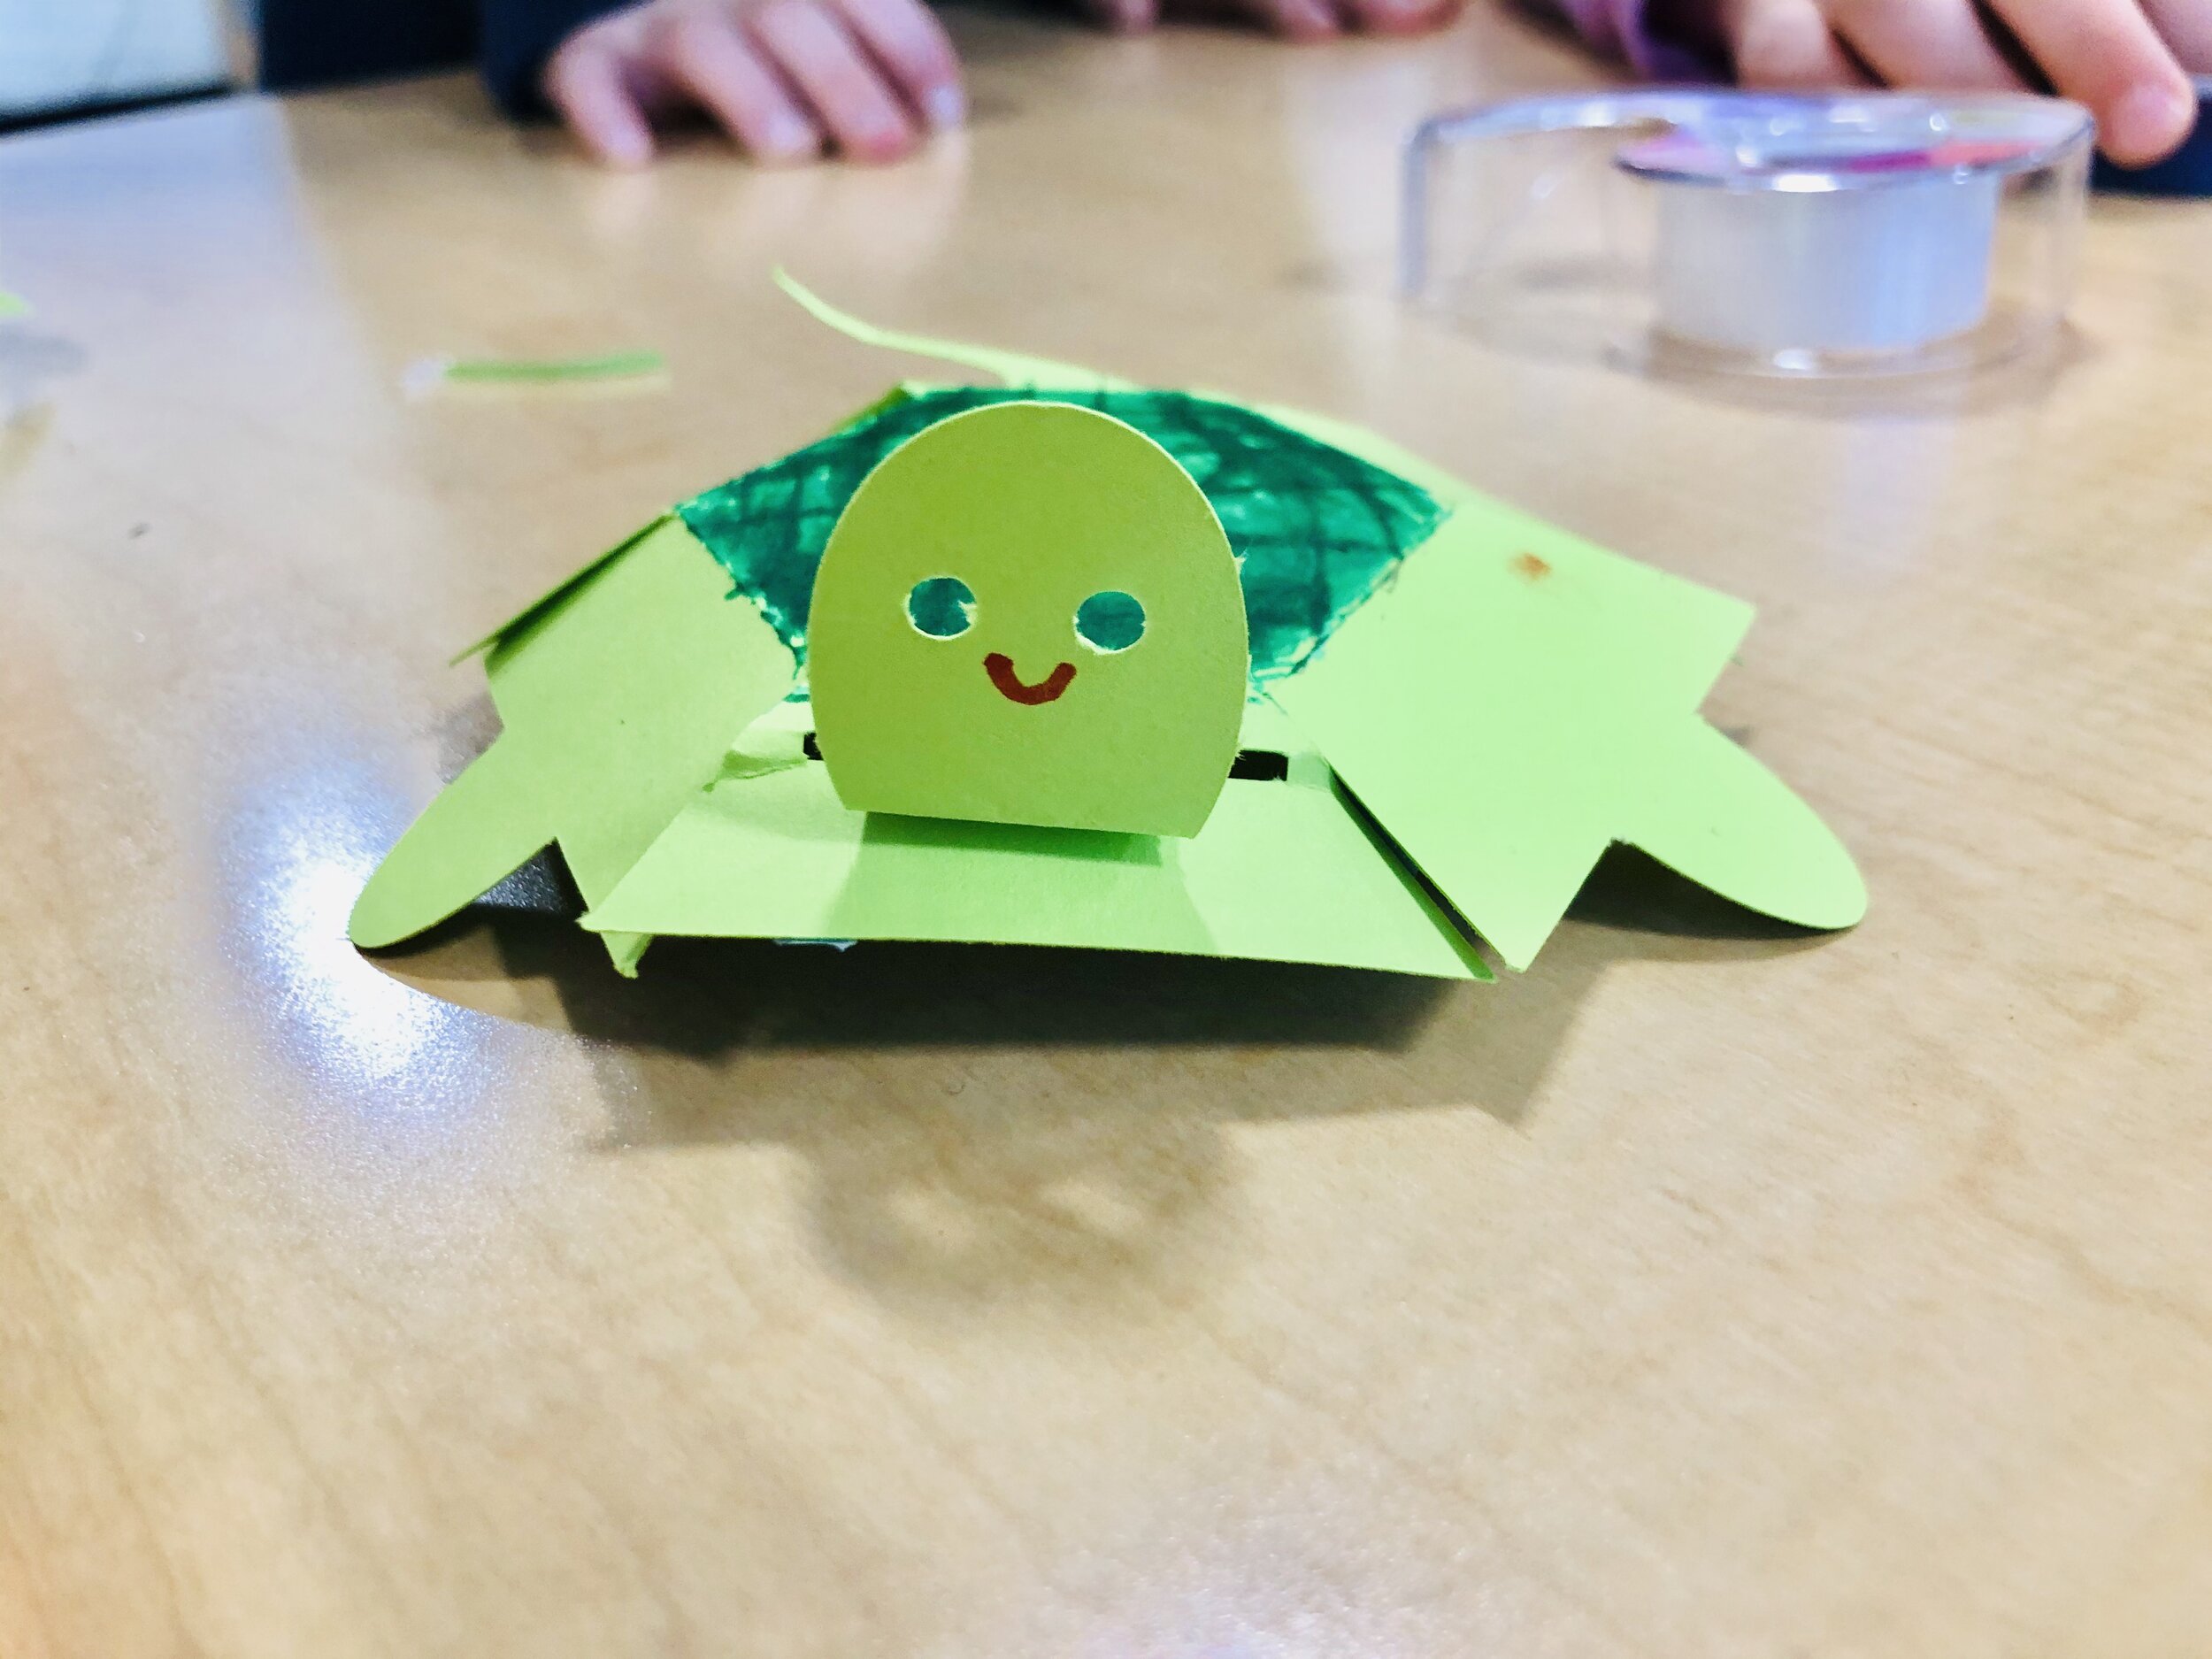
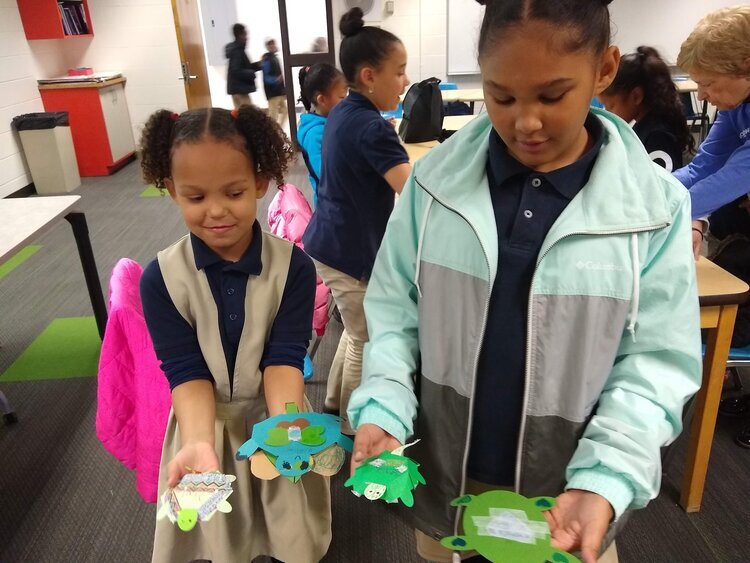
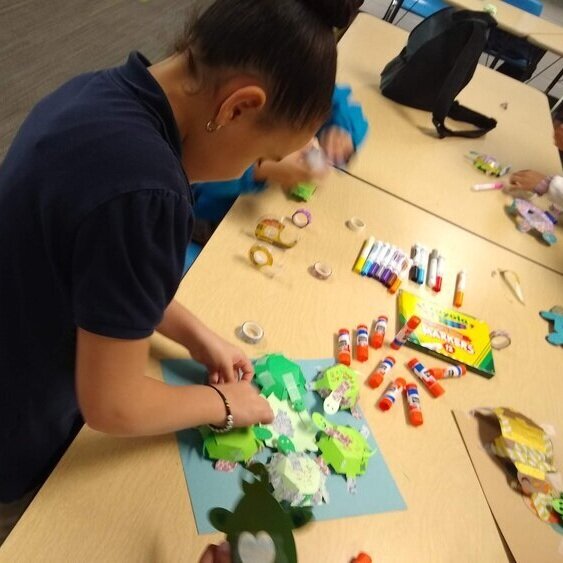
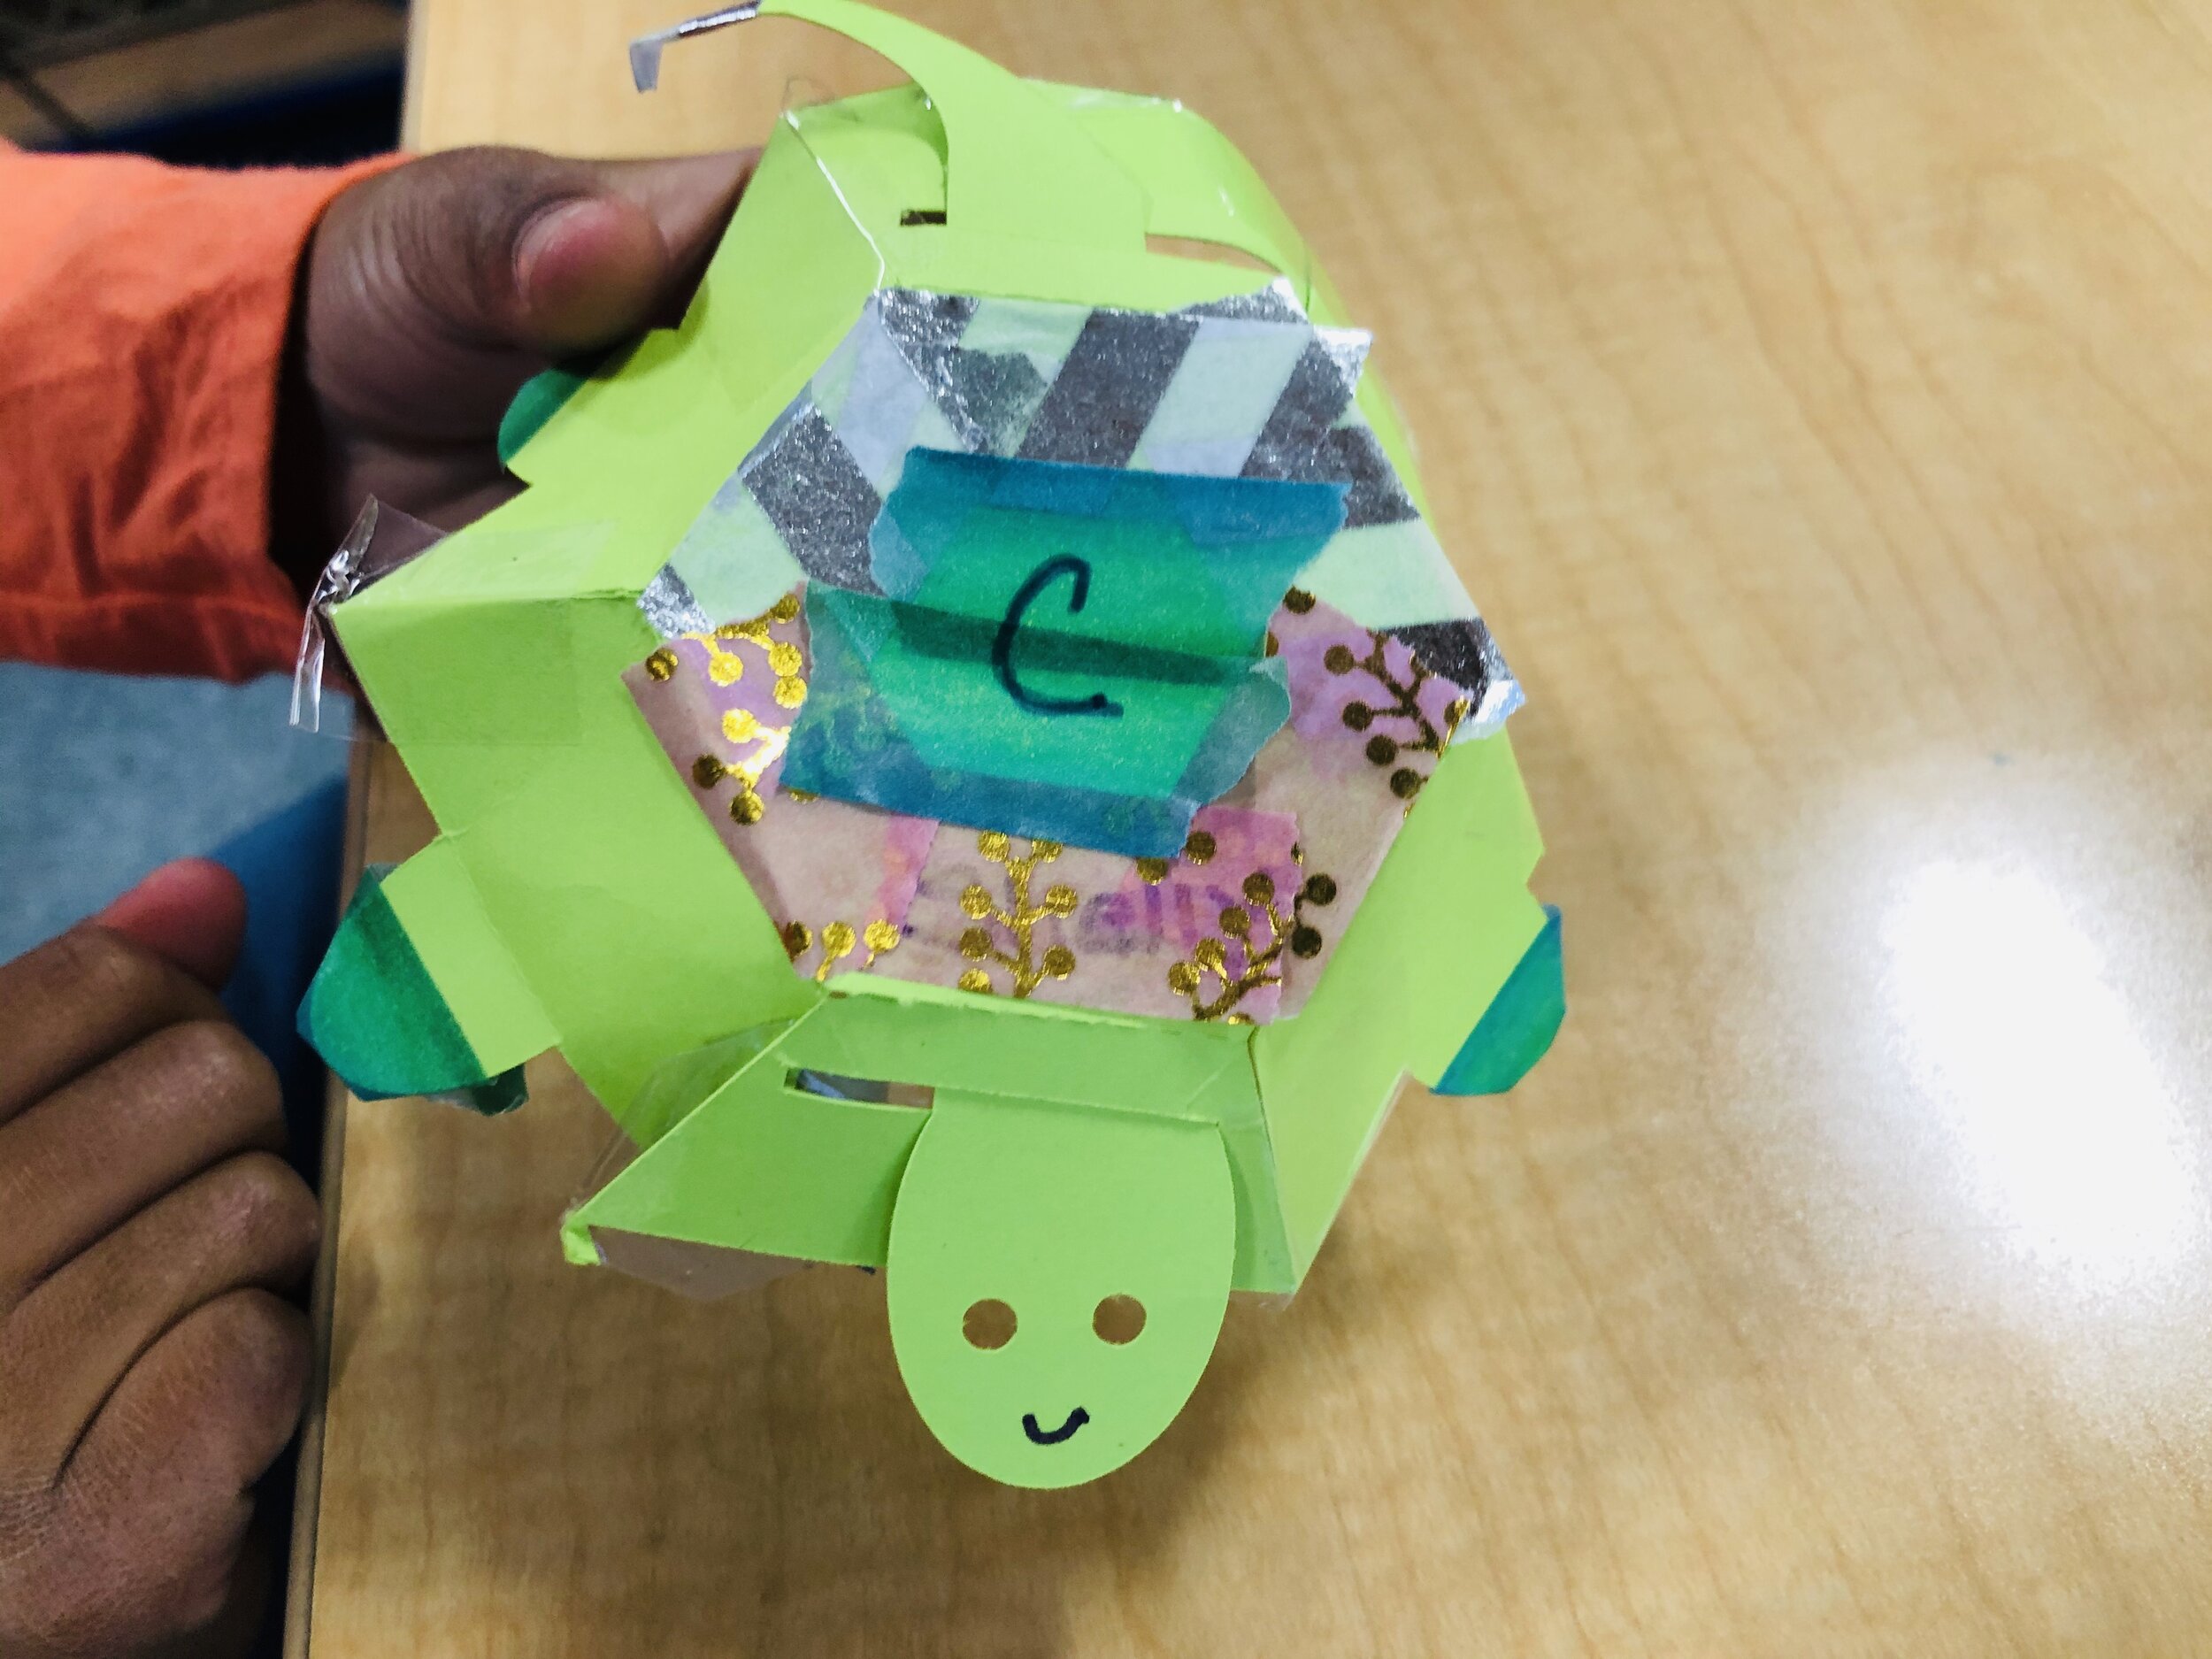
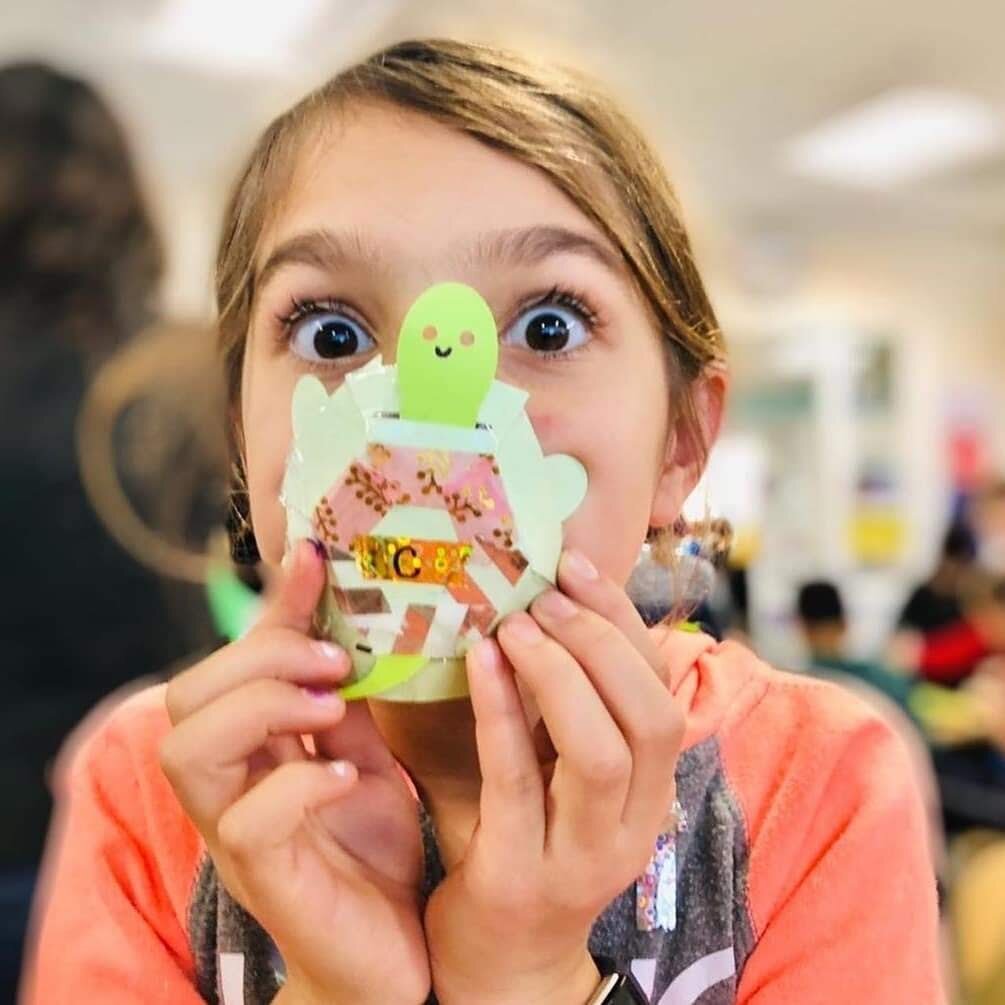
Go Green with Greenie the Turtle!
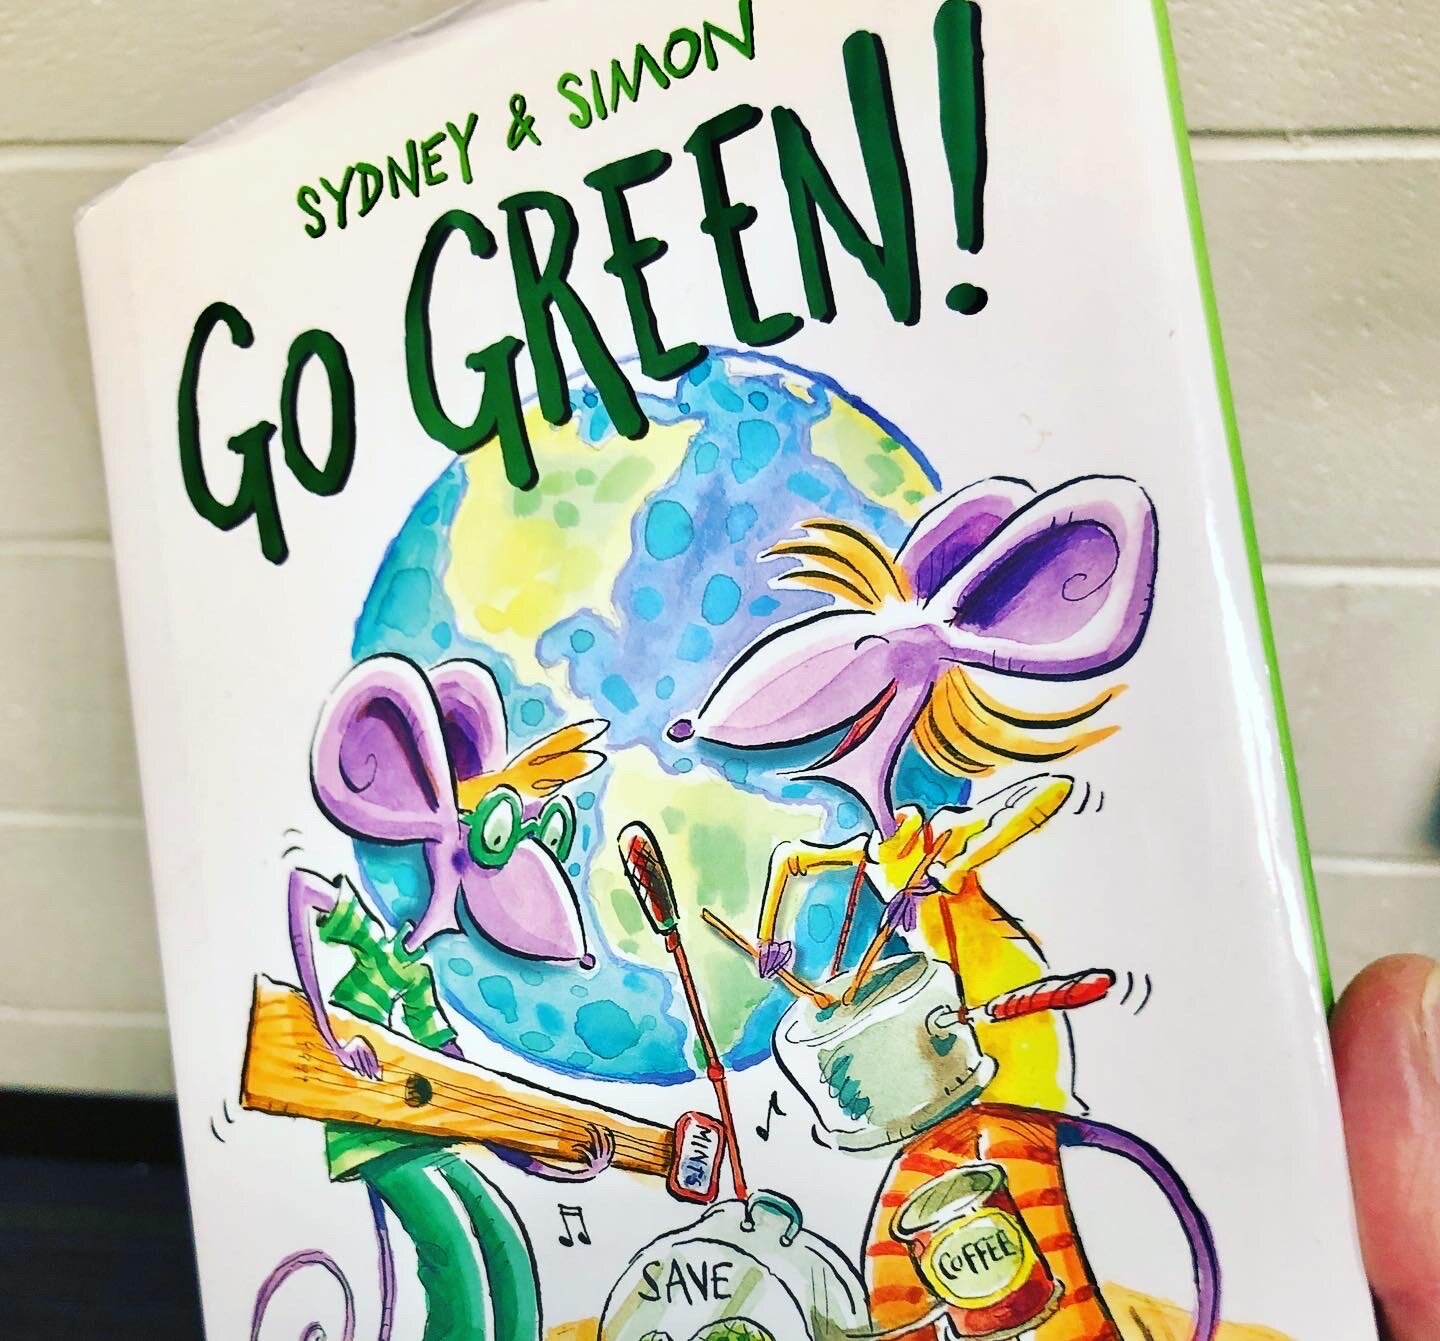
This FabMaker Studio activity is inspired by the book “Go Green!” from the Sydney & Simon series (Paul Reynolds and Peter H. Reynolds, Charlesbridge Publishing) and is a great way to explore ocean wildlife.
In the book, Sydney and Simon learn about a turtle named Greenie who got sick from too much plastic in the ocean. This discovery leads them to find ways to reduce their waste and be more eco-conscious.
In FabMaker Studio, encourage your students to weld together shapes to create a turtle. For an added challenge - limit the creation to two shapes. Want to do deeper? In the FabMaker Studio Ready-Made projects, students can print a 3D turtle project to design and modify. This project provides an opportunity for you to talk to your students about turtles and other wildlife while also exploring the STEM skills of fabrication.
BONUS IDEAS:
Using the scraps of paper leftover from the project, create lily pads, or leaves for your paper turtle.
Explore the shapes in FabMaker Studio to create fish friends for your turtles (or print them out using our 2D ready-mades)
Do your students learn about recycling? What other oceanic creatures has your class studied? Greenie would love to have more fabricated friends, let us know if your students create any other animals in FabMaker Studio, we’d love to check them out.
How will you be celebrating Earth Day? Share it with the FableVision Learning team via Twitter @FableLearn, or via email: info@fablevisionlearning.com

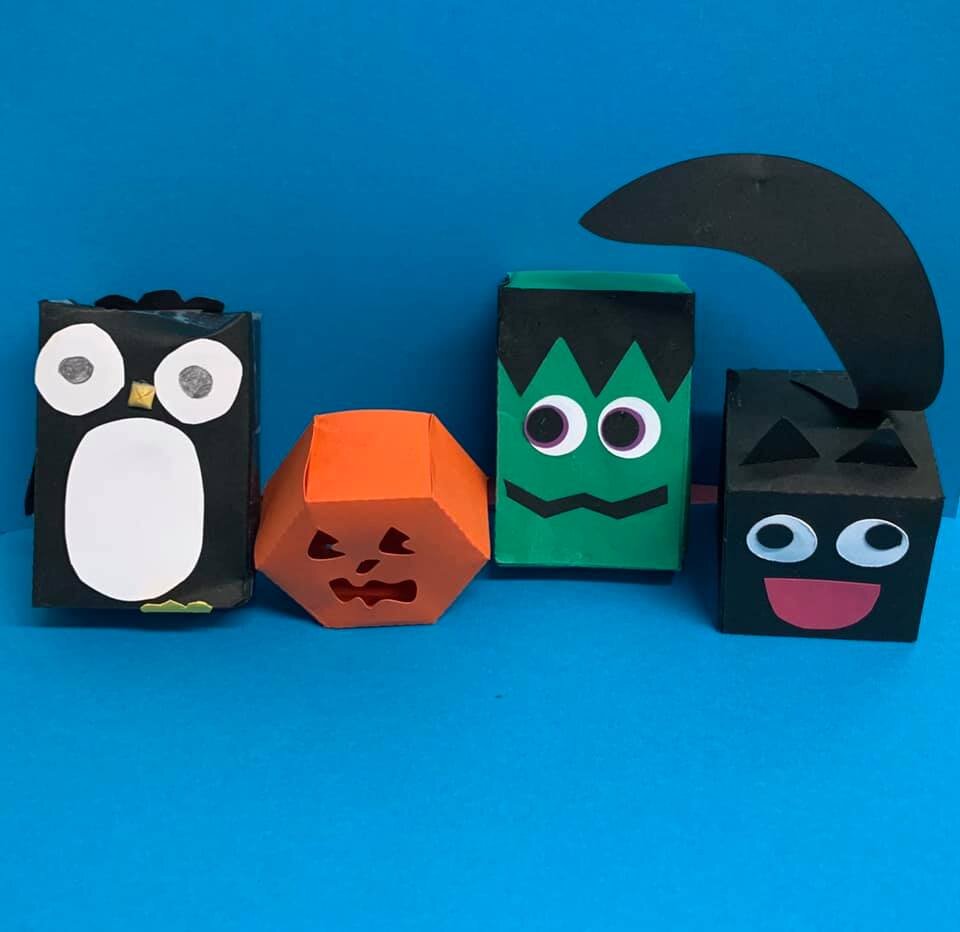
Creative Activities for Halloween
It is fall in New England. The leaves are turning shades of orange, yellow, and red and Jack-O’-Lanterns are popping up on doorsteps. This means Halloween is around the corner and at FableVision Learning we are getting creative with project ideas in made with our creativity tools. Here’s a few to get started.
Boo! Animated Pumpkins and Ghosts
Encourage your students to use Animation-ish to explore motion and story by creating a dancing ghost, or have your students animate their dream costume, or tell a joke on a pumpkin. What’s new: Animation-ish creations made in Flipbook-ish can be exported as a GIF.
About Animation-ish: Animation-ish is an easy-to-use online animation tool that helps students show what they know! Whether you are doing distance learning, hybrid teaching or on site classes, you can weave Animation-ish activities into your lessons.
Mystery Monsters Made With FabMaker Studio
If your students can imagine it, they can create with with FabMaker Studio. In the Mystery Monster Blog Post, Dr. Peggy Healy Stearns, Lead Designer for FabMaker Studio, shares her tricks and tips for using the web-based design and fabrication program to combine, weld and morph shapes into exciting creatures. What will your students create?
Create a 3D “Mystery Monster”
But Wait. there’s more!
Jack-O-Lantern
The 5th graders in Palm Beach County, FL combined their FabMaker paper prototyping with circuitry to light up their paper Jack-O-Lanterns. Want a quicker fix? If needed, Peggy recommends substituting circuitry with LED votives.
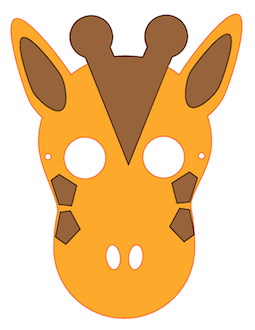
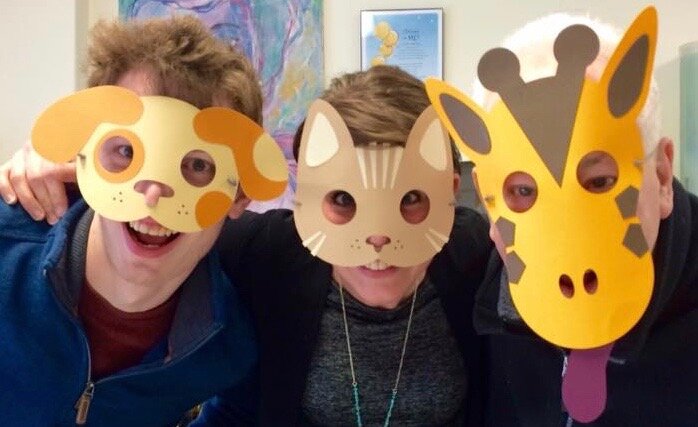
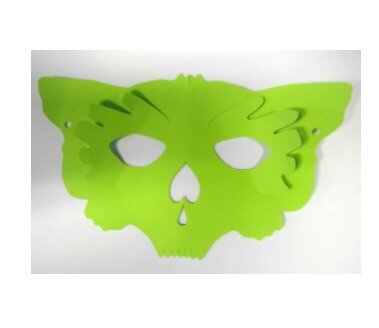
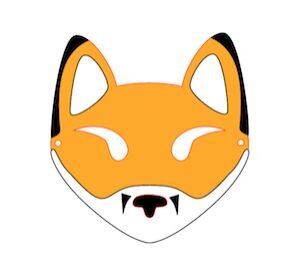
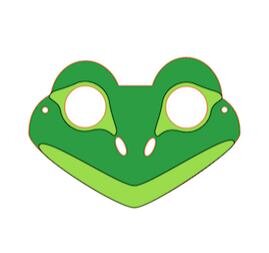
Masks
Halloween is a great time to explore some FabMaker Studio Ready-Mades. There is a library of masks available to choose from.
Or you and your students can create your very own from scratch.
BONUS: for a more advanced mask, add 3D elements.

Looking to make a socially distanced Halloween a little more fun? Use FabMaker to create candygrams to give to friends- or even a candy corn garland!
About FabMaker Studio: FabMaker Studio is our digital design and fabrication tool created to get students prototyping with paper. For more tips and tricks on how to use a printer and a pair of scissors, click here.
How will you be celebrating Halloween? Share it with the FableVision Learning team via Twitter or Instagram @FableLearn, or via email: info@fablevisionlearning.com

Free Printable Activity: Let’s Create a Mash-Up Story!

If you find yourself with young children at home who are looking to both socially engage and exercise their creativity, this collaborative Mash-Up Story activity might be a perfect fit.

Step One: Drawing Roles + Defining the Challenge
To begin your collaborative “Mash-Up Story” activity, print out these free Paper-Slip Templates, which address the following story elements:

Primary Characters
Secondary Characters
Locations
Objects
Feelings
You will notice that half of the slips are filled in with starter ideas, and half are left open for you to complete. Brainstorm as a group, and consider characters, places, and objects that are meaningful to you!
When all of the slips are filled in, cut them out and place them in 5 containers that are separated by subject matter. The containers can be jars, hats, bowls, or whatever you have on hand.

Then, for each participant, conduct a “drawing” that results in each person having a series of 5 story prompts. You can make this process as theatrical as you’d like. (Drumrolling is optional.) For example, “Julie” might end-up with:
Primary Character: Talking Fish
Secondary Character: Pinocchio
Location: Trampoline Park
Object: Magic Coin
Feeling: Jealous
The other participants will each have a different series of prompts that they will be challenged to combine in a story!
Step Two: Brainstorming, Writing + Illustrating the Story
Prior to writing, each participant can brainstorm about their own plot line, central message, and even mood structures (reference: Trevor Bryan).

Image courtesy of Trevor Bryan
Depending on the age of your group, you can challenge your writers to teach a lesson, or to devise a story structure that starts with a difficult hurdle and ends with a happy resolution.
(For more information about Using Mood Structures to Support Student Writers, see the blog post by Trevor Bryan.)
Next, print out this Cover Template and Illustrated Pages Template.
With an idea in mind, participants can then dive in to their writing and illustrating. You can print out as many copies of the pages as you might need…don’t be afraid to adjust your approach partway through, or rewrite!
Adjustments, edits, and revisions are part of the fun.

Step Three: Share, Collaborate + Repeat
Once the stories have been written, they can be shared. Keep in mind that this component represents an opportunity to connect virtually with people in other locations.
This week, we have been sharing our printable activities in advance with grandparents, cousins, classmates, and friends, and then using FaceTime, Zoom or Skype to share our stories.
It allows for a dedicated time each day to reach out, to share laughter and ideas, and to hear familiar voices.
Step Four: Crossover to Other Media (Optional)
If you’re working with kids who have a favorite method of self-expression, you can encourage them to take their story to the next level!
They might:
Make a comic book or graphic novel.
Turn their story into a script for a play, and act it out with costumes.
Storyboard and animate their concept, in a program like Animation-ish.
Make a stop-motion video with Legos/figurines, or record a live-action video with family members reading different roles.
Remember, storytelling is a fun, powerful, collaborative tool. You’ll be surprised to see how differently people approach their characters and concepts!
Printable Resources:
In the coming weeks, we will continue to share resources for creativity. If you have ideas, questions, or comments, please reach out to us at info@fablevisionlearning.com.
We would love to connect the dots with you!

Encouraging Creativity at Home

As a mother and educator, I am now, like many across the globe, working to find a new normal with my elementary aged kids at home. With everything so up in the air, I’m finding myself grateful for the training and experience I have in creativity, so I thought I would share the first two things I did when my kids’ school was closed.
Embrace the Challenge.
This is a creativity skill. When we run into a problem, we are more able to handle it with resilience and creativity if we see it as a challenge to be faced. This attitude is going to be necessary many, many times while we are social distancing. My kids miss their friends, they need things to do while I work, we’re not used to everyone being home all day every day. Challenges are going to appear. So, when they do, we put on our creative thinking hats and state the problem as a question:
“How might we organize our day?”
“How to connect with friends and family?”
When the going gets tough, this is what we are going to try to do - recognize the challenge, state it as a question, and then engage in divergent thinking.
What is Divergent Thinking?
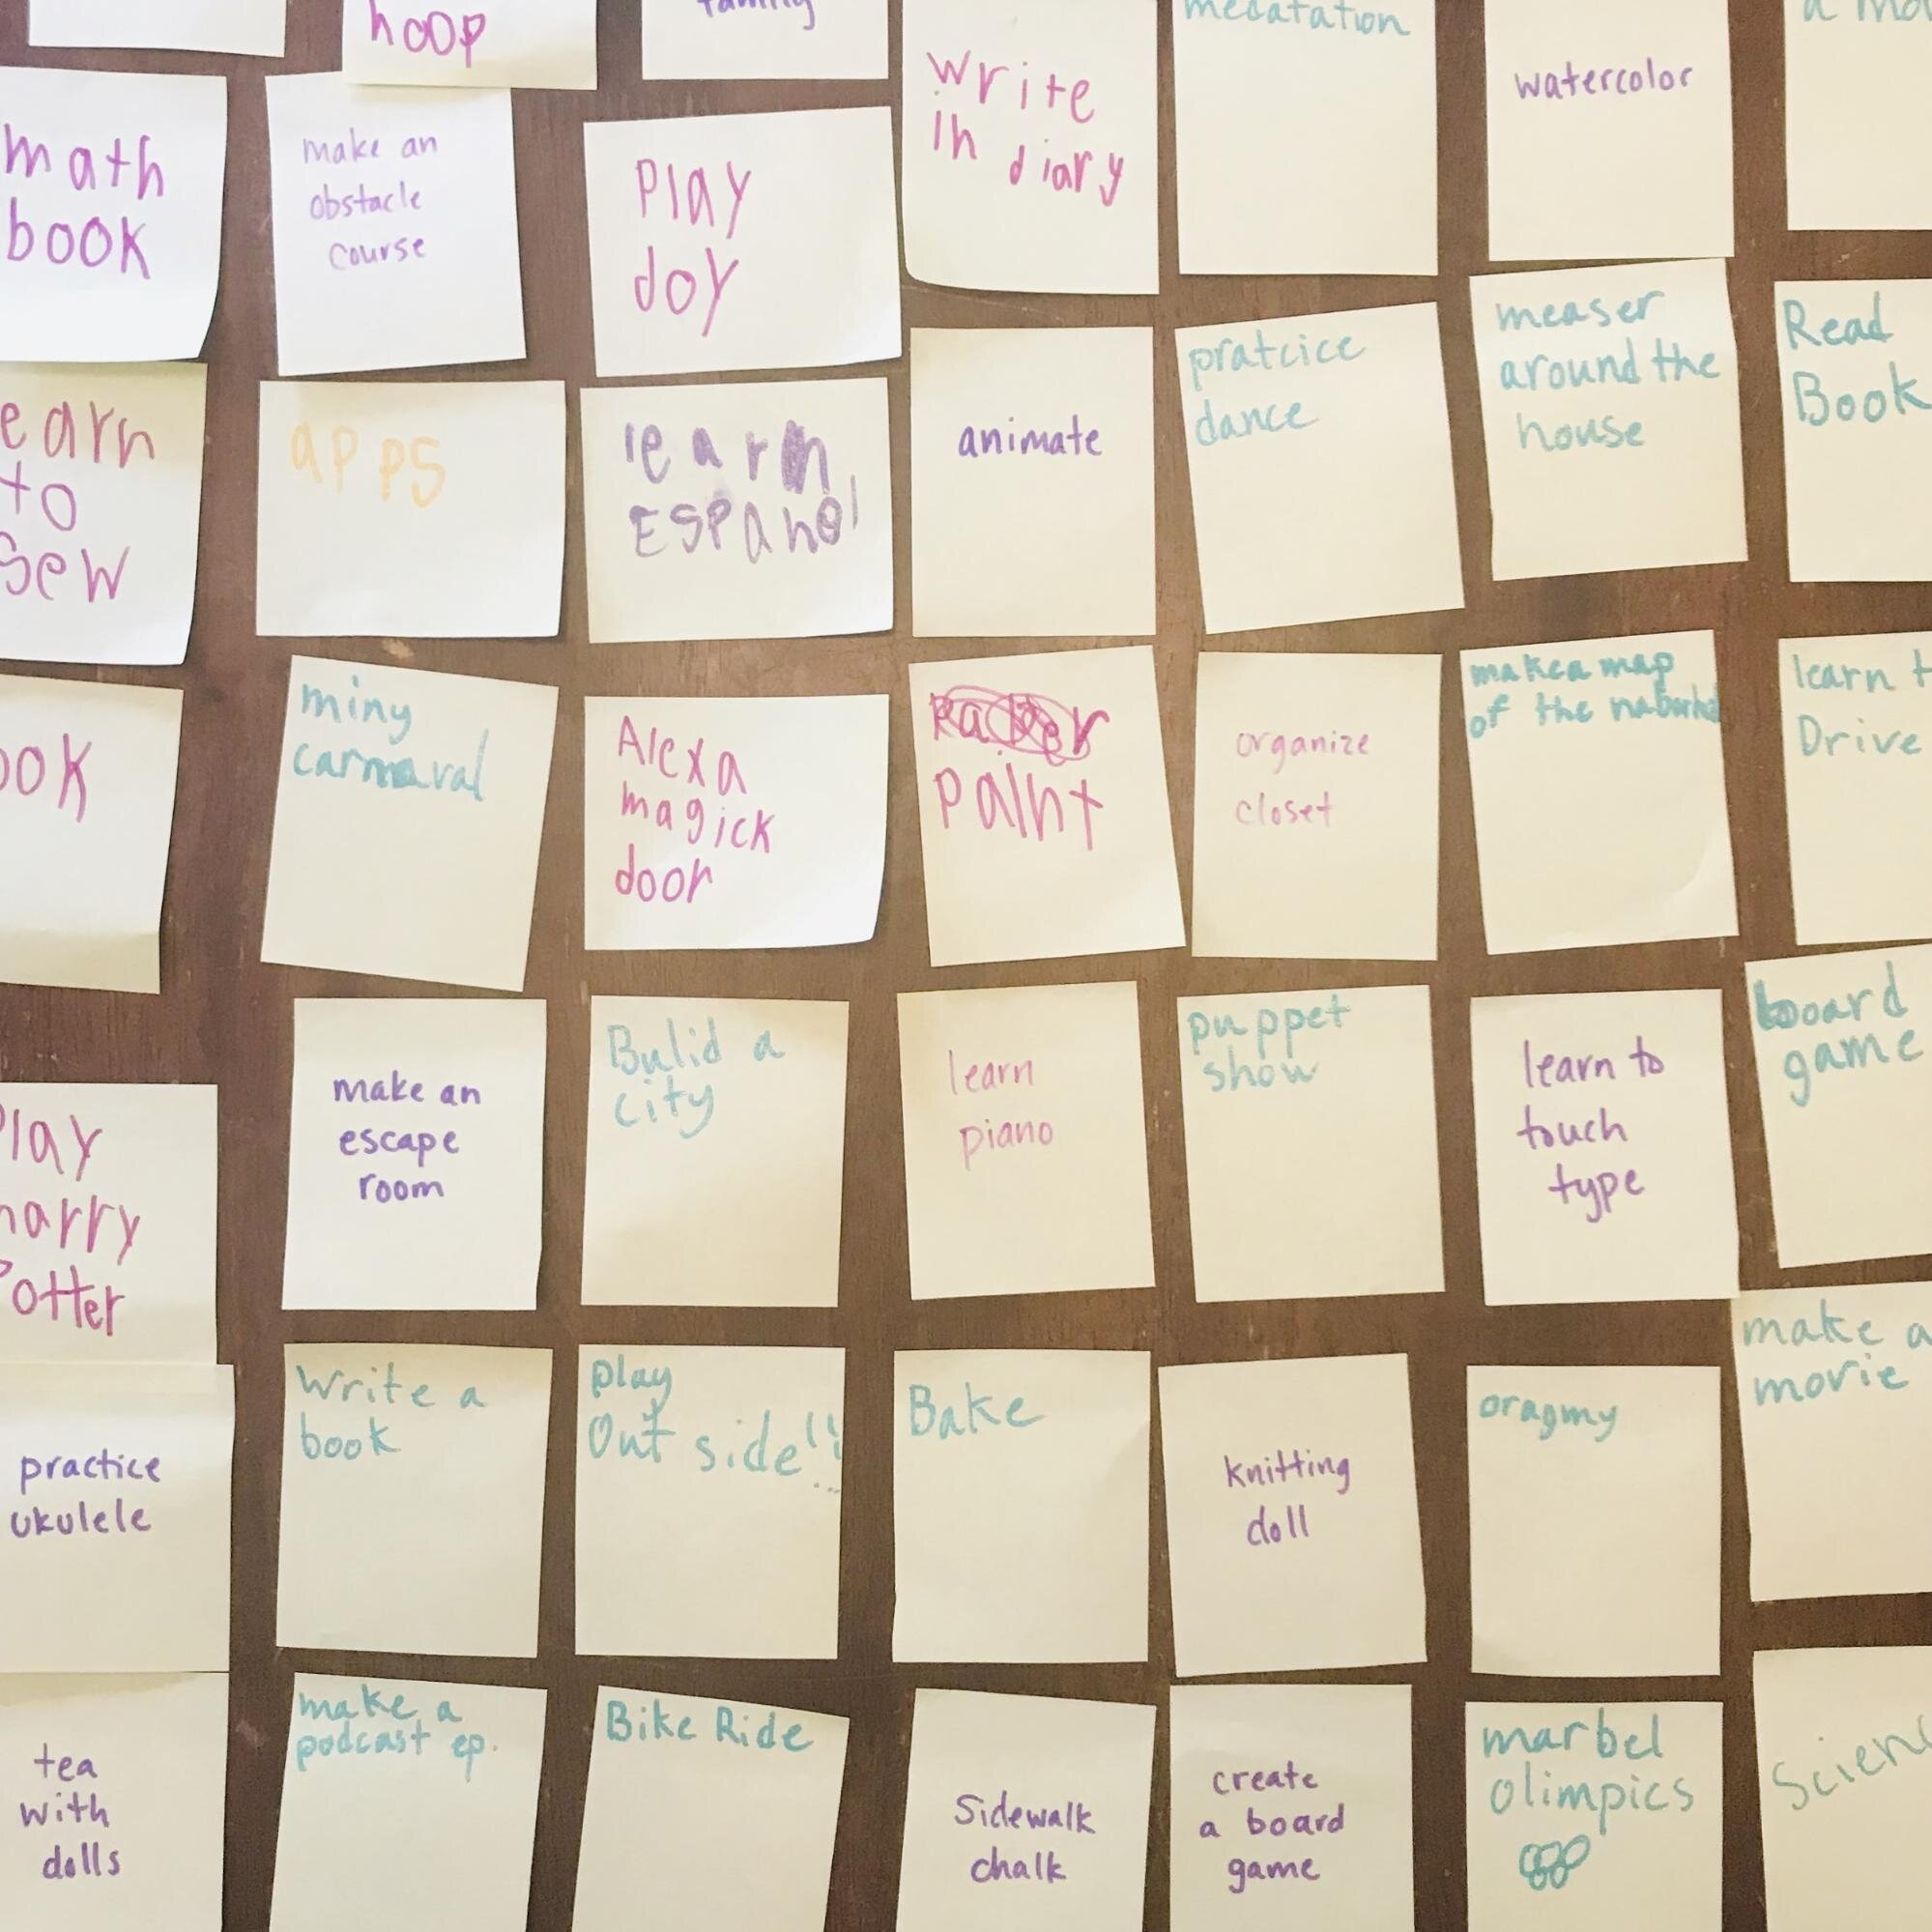
Divergent Thinking is a foundational building block of creativity. In my house, once we recognized the challenge before us, I gathered the kids and pulled out a pack of sticky notes and the magic words of divergent thinking: “What might be all the…?”
We focused on what the kids could do while at home for the next while. I wrote “What might be all the things to do?” and we started coming up with as many ideas as we could. We wrote each one down on a sticky note without judgment. Divergent thinking is all about letting ideas flow freely and accepting others’ ideas. We came up with over 50 ideas in a pretty short amount of time, and I left the sticky notes out so we can continue to add.
We don’t know a lot about what is going to happen in the next few weeks, but we do know it’s going to require the best of our resilience and creativity, and our children are going to see and learn from the way adults respond.
Through this, I hope my children learn that we can work together to make the best of a hard situation, that we can problem solve creatively, and that we are here for each other in hard times, ready to face challenges.
There are lots of amazing ideas for parents and children on the internet. I urge you also to spend time coming up with your own ideas together as a family. We can give our children the gift of learning how to confront the many challenges they will face in life as they grow.
Here’s a fun divergent thinking activity we like to do with kids to get them thinking flexibly.
About Sara: Sara Smith is Creative Education Development Manager for FableVision Learning. She holds a Master of Science in creativity from the International Center for Studies in Creativity at SUNY College at Buffalo. Sara is compelled by learning and its intersection with creativity, and her vision is to develop and support creative communities that help people to grow and to nurture their passions and strengths.